We ran out of time when it started raining the afternoon before a huge snowstorm, so we duct-taped trash bags around the door frames just to seal it tight!
Our self-imposed deadline for rebuilding our hoophouse was February 28th, and we just sort of made it by the skin of our teeth! By that we mean the thing is now functional, although currently still has one wall closed in with duct tape and trash bags. Still, it has gotten over 110°F in there while only 36°F outdoors, so the trash bags apparently are much better at holding heat than we expected!
Snowy outdoors -- still above freezing indoors!
Outdoors: 20.7°F In Hoophouse: 34.3°F -- pretty good for not being quite done yet!
In hoophouse construction, general practice seems to be that you band together as many people as you can for a modern barn-raising style event where you can have all-hands-on-deck working as needed. But since the two of us are working by ourselves here, we have to figure out creative ways to get inanimate objects to serve as our co-workers. To get the plastic over top of the 10' tall hoops, we tied 2 sticks to 2 ropes, connected those to the corners of the plastic which we'd folded accordion-style, and then threw those over top of the structure. Chris pulled the ropes while Bea poked at the corners with a 2x4 whenever they got stuck on the monofilament. We had this system working surprisingly well by the time we got to the final piece of plastic!
Installing our plastic in 2010: all hands on deck!
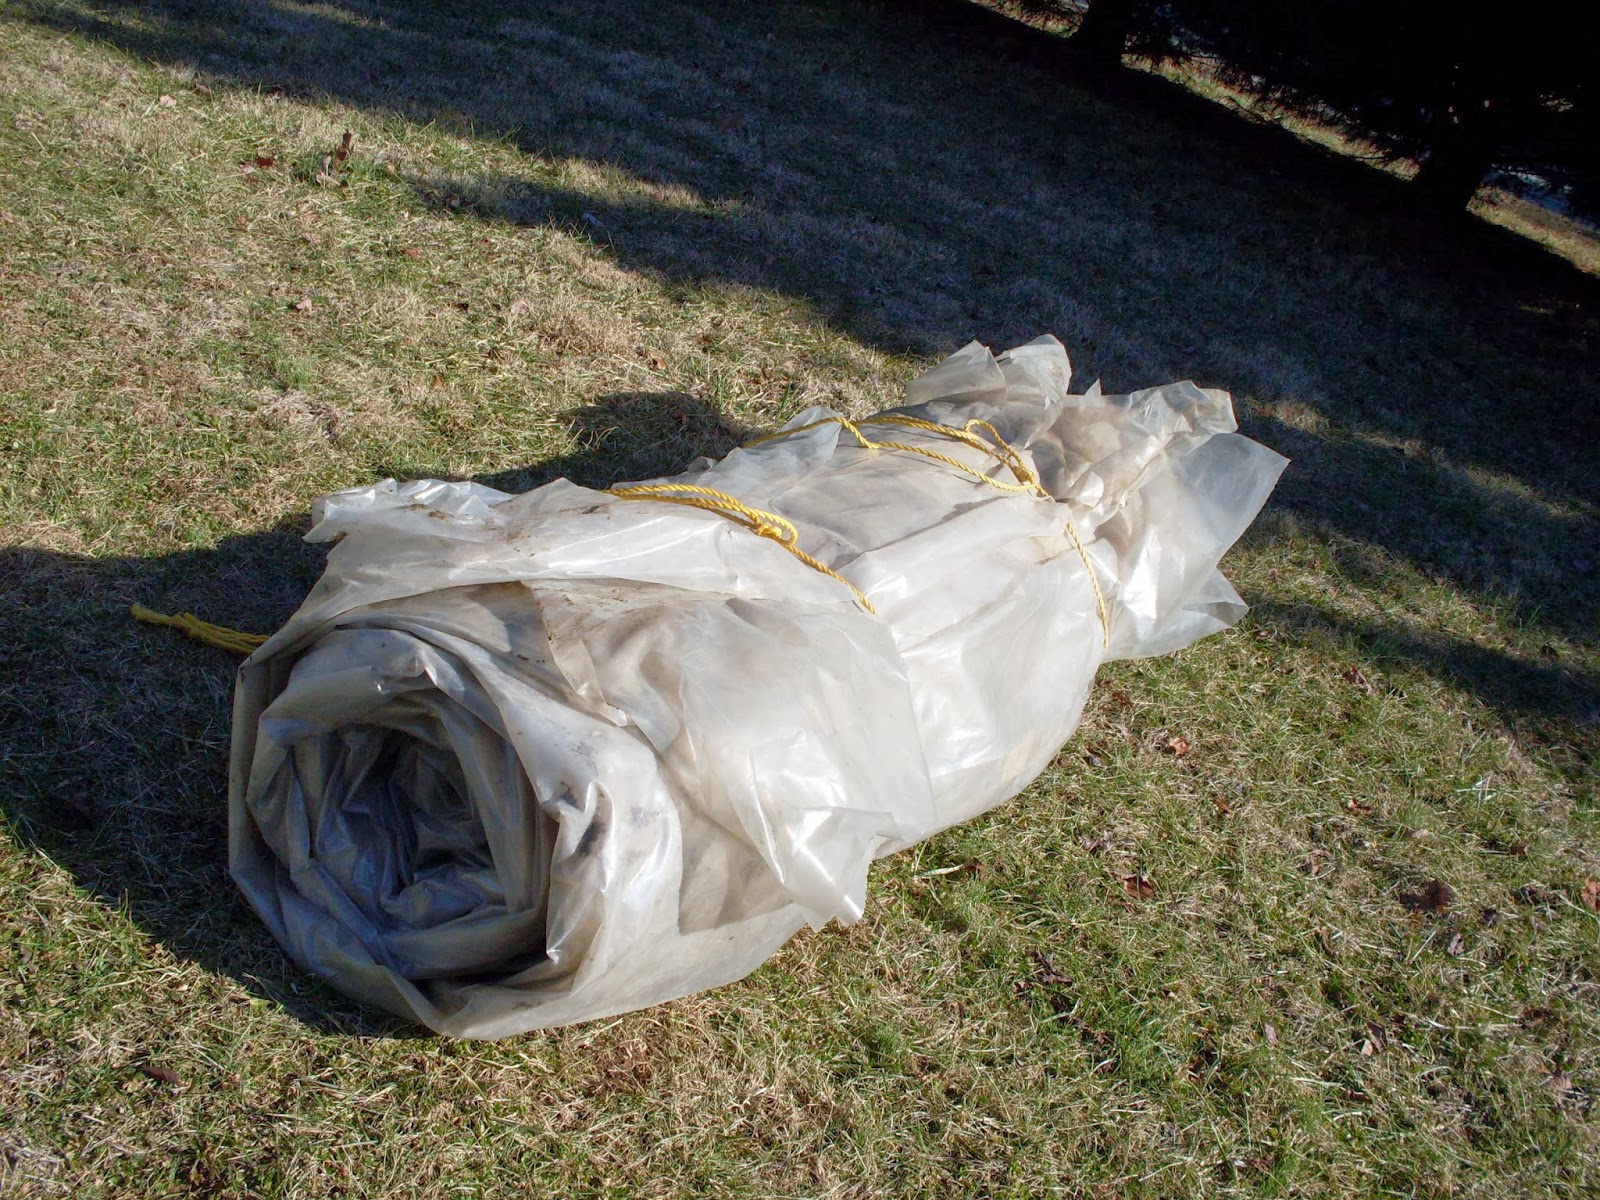
Plastic rolled up small for storage/transport
Our method of plastic installation in 2014
Duct tape over the metal joints keeps plastic from tearing
Framing up the storm doors on the end-walls was fairly simple -- we got 4 used storm doors (2 pairs of matching heights) and built frames around them in place. We added a little room for expansion in the summer heat, and then added 1x2 door jambs (and will probably add old bike tube gaskets as weatherstripping) to keep it tight in the winter. Since the east side is lower than our west side, we'll be filling in the gap at the bottom of the frame with wood chips or mulch for a seamless entrance.
Mulch filling in the gap caused by the slight hill
For our window vents, we were able to find one cheap used window of an appropriate size, but had to build the 2nd one from a piece of 1/8" thick plexiglass and a couple 1x2s. To build the 2nd “window", we used a table saw to cut a sawblade width (1/8") groove along the narrow side of the 1x2, maybe about 1/2" deep. We ripped two 8' sections like this to build a rectangular frame. After quite a bit of debate about how to lap the corners, eventually we cut them at 45 degree angles and just stapled them together to create a FrankenWindow! This could definitely be a lot more attractive but we are starting to lose our perfectionism the closer our building process drags on toward spring!
Bea with our completed window
Then we built window frames above our door frames, and attached our windows along the top edge with really long piano hinges so that they'll open easily for ventilation. We purchased a couple of Univent automatic window openers (a really cool invention!) which is basically a temperature-controlled hinge that opens up to 18" (pushing the attached window open with it). These windows are meant to serve as our “fail-safe" ventilation method, whereby if we accidentally forget to open up the hoophouse (or sleep in, or spend a night away from home or whatever) -- these automatic vents will open up to let out hot air to keep our plants from getting fried in the heat.
Completed South Endwall -- window open since it's over 80°F!
We got some advice from our friend and hoophouse-building expert Adam (check out his excellent Baltimore-based design-build company!), who suggested we add a short plastic skirt along the baseboards that will overlap the sides when they roll down to prevent a lot of air leaking at ground-level where it's coldest. He also suggested we add permanent pieces of plastic on the 4 corners that will also overlap the roll-down sides that'll create a tighter seal when the sides are down.
Taking his advice, we used some electric fence wire clamped around each end-hoop to hang a 9" skirt on each side, and then added the overlapping corner pieces hanging from our slanted gutter/hip-board.
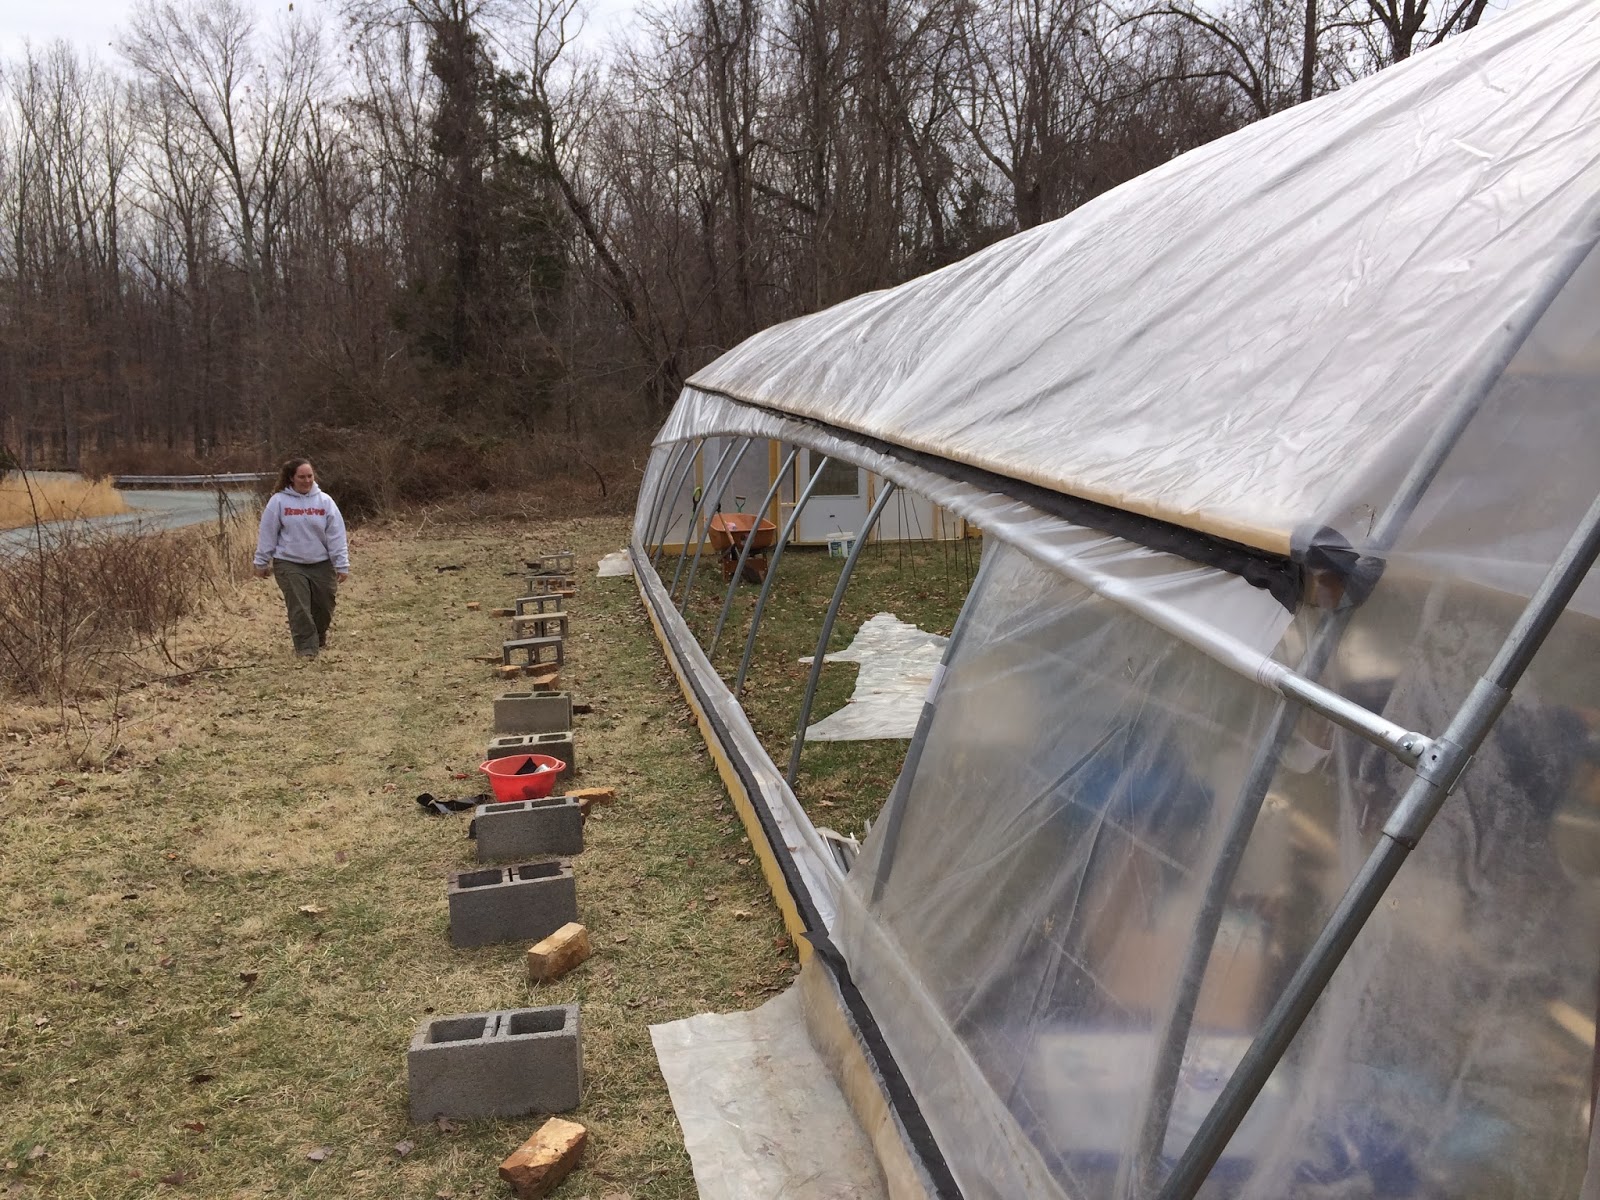
We used regular 1-3/8" galvanized chainlink fence toprail as the core for our rollup sides, connecting them together with a self-tapping metal screws and duct-taping over. We then attached the bottom end of the plastic sides to the fence rail with some greenhouse clamps specially made for this purpose. We picked up a fencing bracket to connect our scrap pole to the end of the roll-up side which will serve as our lever to raise and lower the sides.
Temporary sides: weighted with cinder blocks & bricks
Now rollup side is installed!
A simple lever gives enough mechanical advantage to easily roll up the 50' length of pipe.
Here's the side rolled up!
And here's Chris rolling the side down again:
So functionally, our hoophouse is now complete and we started our first 12 trays of seeds for the year on March 5th, only a few days later than we'd hoped! There's still a lot of digging ahead of us to get the in-ground plantings in over the next few weeks. And next steps on construction? Those gutters are still sitting around waiting to get hung up, and 20 barrels are still working out the logistics of the best way to connect themselves into a mega rain barrel system. Oh, and the truck is full of a yard of defrosting-but-still-frozen mulch to replace some cinder-blocks as air stops under the door frames. Hope to get landscaping fabric down and truck unloaded before the rain forecast in 2 days time!
The hoophouse starts fulfilling its purpose: growing food
Mixing up a potting mix
Chris seeding some of our spring crops
Seeds started!
Enjoying a last break in the hammock before bringing it back outdoors...
While Bea was having such a great time with her crop-planning,
I had a different idea of what constitutes fun.
I decided to get outside and attack some brush!
When we moved our first load of stuff down here back in
October, Bea & I took a walk through the back yard, day-dreaming about
where we might site all her various garden infrastructure. She quickly determined that pretty much every
plant growing back past our south lawn was an invasive species of some kind or
another, and that if we wanted to stop these plants from spreading up into the
useable section of our yard we would need to apply some major brute force. Bea also has some half-baked idea about
growing shitake mushrooms back in the woods, some day once we can actually walk
into them.
Fast forward to mid-November and we finally got some decent
photos that we could use to try to ID these invasive plants and figure out the
best way to remove them. We’re not weed experts
by any stretch, so please correct us if we’re wrong! Here’s our best guesses:
Blunt-leaved privet:
Japanese Honeysuckle:
Saw Greenbriar (Smilax):
Air Potatoes, aka Chinese Yams:
Still not sure yet:
The Process
My first tactic was to take loppers and cut everything off
about waist height. For the privet, this
left stumps that we could use to pull them up from the roots. For the vines, this at least gave me
something fun to swing from while trying to pull them down from the treetops!
Step two of this plan was to take our fancy new Brush
Grubber chains and attach them to our lawn tractor. This tactic was highly successful at tearing
up grass, but a complete failure to pull out any brush. Note to self: lawn tractors are really only
for cutting lawns.
Next tactic: find a clearance sale on cheap come-alongs and
buy one, plus a tree strap. Wrap the
tree strap around (you guessed it) a tree and then voila – two long minutes of
cranking to pull out a middling stump clump!
Several stumps and one very tired arm later, at Bea’s urging
we proceeded to our next tactic: purchase a clearance sale electric winch. We asked advice from a store employee, who
looked at us like we were insane to try and take out shrub stumps with this
product, despite the fact the box clearly showed the winch hooked up to a huge
old tree stump. The employee simply said,
“Well, I can’t really say I could recommend that idea. If it breaks loose, it could kill you.” Undeterred, we ended up back at home with
this winch. Here’s how it went:
Our weakly winch could only pull the smallest of clumps, and
it still took way more time than when Bea just dug the puny ones out with a
shovel. When we tried hooking it up to a
larger stump, the winch started smoking and soon shut itself off. Apparently the photo on the box only showed
the winch hooked up to the tree
stump, not actually removing it from the ground.
Next we tried hooking up the hitch on our cargo van directly
to the brush grubber chains. We made
some really nice tire tracks in the lawn and in fact got the van stuck in the ensuing
mud ruts for a good long while; apparently vans aren’t meant to be used as
tractors either.
Chris barely visible through our privet disaster
So many invasives!
Tangled mess...
Bea asked some friends who are well-versed in invasive weed removal
and they pretty unanimously suggested getting goats. While that might be in the cards for the future,
we were hoping to make a decent dent in the brush removal project this year before
everything leafs out in spring. Plus the
privet clusters are over 8’ tall, so the shorty goats we plan to get won’t be
much use on the plants that are already established! (It’s also been said that privet-fed goats
make poisonous milk!)
Somewhere along the line of researching the price of
replacing the weak winch with a better one, we came across an amazing product:
the snatch block! This little device
will double your pulling power, and hopefully either give our electric winch
enough power to be an effective member of the team, or save my right arm from
endless amounts of cranking. However, by
the time we placed our order apparently this product is now back-ordered so we’ve
been waiting for it to ship.
The right tools make any job easier!
So meanwhile, I’m back to my original tactic: cutting and
pulling by hand. After a couple weeks of
lopping, Bea’s grandpa’s ancient loppers finally gave out and I had to turn to alternate
tools. Bea found an old hatchet under
the seat of her truck (kept for those emergencies when, you know, you find
yourself alone in the wilderness and only have a hatchet) – this was helpful at
cutting some of the larger vines. She
also turned up her grandpa’s machete which is a lot of fun to wield against the
smaller vines. And today we finally replaced
the broken loppers with some compound bypass loppers – way nicer to use on the thicker
privet branches.
Overall, I have to say, manual brush removal is a great form
of stress relief and exercise. To paraphrase
Thoreau: the brush will warm me twice – once when I clear it and once when I burn
it.
Before!
After -- not quite the same angle, but this is the same section of woods!
Stay tuned for an epic bonfire and house-warming party sometime
this spring!
This past week we got our first major snowstorm of the
season. This storm wasn’t especially
ferocious or anything, we didn’t lose power and our pipes didn’t even freeze
this time – but the storm brought cold temperatures and the kind of snow that has
a hard crust of ice on top and sticks around covering everything for a week or
so, making it hard to walk off the porch or get a car out of the driveway (we
still don’t have 4x4).
Too deep!
Chris has bravely donned his warm coat and boots each day
and wandered to the back of our property to continue his battle to save our
small stand of trees against the invasive brush. More on that another day!
Bea has less bravely donned her slippers and joined the cats by the fire, drinking cup after cup of hot tea, and playing with spreadsheets to plan out our crops
for the 2014 season. We are still about
a long day’s work from being able to close in the hoophouse so unfortunately at
the moment all of our gardening is still being done in the electronic/hypothetical
format. We are getting very uncharacteristically
organized though, and appreciate these cold winter months to provide the
opportunity to sit still long enough to plan things properly!
First, we sorted out all the seeds we already have on hand,
which is a kind of ridiculous amount due to the fact that Bea was “paid” for a
past internship in free seeds [she literally
worked for peanuts!]. While seed companies
aren’t allowed to sell seed packets past their stamped sell-by date, most seeds
actually retain their viability 5-10 years past this date – so you can use old
seeds, you just might want to double-seed to anticipate lower germination
rates. We split all the seeds up into
families and then types, then varieties, and then catalogued these in a
spreadsheet as we Ziplocked them together for way better organization than Bea’s
previous method (throwing everything jumbled together in a single large bag). Ultimately, we figured out that we hardly had
to order any seeds compared to which crops we wanted to grow – yay for knowing (and
using) what you have on hand!
Spreadsheet I made back in 2000
Bea’s aside: thank goodness for Microsoft Excel! Once upon a time, I thought that Excel was a
tool only useful for making calculations that you might just as easily use a
calculator for. It might be helpful if
you needed to make a graph or as a makeshift contact database, but otherwise I
didn’t really ever have any reason to open this software. Then a few years ago while working on a
project together, a good friend asked to see my contact spreadsheet; I wasn’t
prepared for his eyes to bug out in embarrassment for me and my poor Excel
skills! He quickly taught me about
borders, shading, formatting, and the importance of having your documents
actually appear presentable & understandable “just in case” you’re asked to
share your data. Now Excel is just about
my go-to application for any purpose I can squeeze out of it – in this case, after
cataloguing all our seeds and crop list, it’s now serving as my graph paper!
Our planned Hoophouse 2.0 layout -- click for larger version
So here’s our floor plan for our hoophouse, which will
feature 136 square feet of bench space where someday we’ll be able to start way
more plants than we intend to grow to maturation ourselves (i.e., for sale or
trade). The benches will be built atop a
series of 55-gallon barrels which will also serve as our primary water source
for the hoophouse. The open space near
the barrels will be where we park our stationary bike which will be hooked to a
water pump, with irrigation lines being distributed to each side of the
hoophouse. The beds along the sides are
designed to maximize the amount of in-ground growing space while still being
manageable for one person to tend by hand.
For now, we’re also going to have a compost pile and some storage shelving
in the other end of the hoophouse, although in future seasons we’ll most likely
find less prime real estate for these purposes elsewhere on our property. This first growing season is admittedly an
experiment, so we purposely wanted to leave some space underutilized so we can
grow into it in case we find there is in fact a market for our veggies or
plants besides ourselves.
Our in-ground growing area in the hoophouse will be home to our
spring crops: Leeks; Onions; Broccoli; Brussels
Sprouts; Pac Choi; Cauliflower; Cabbage; Kohlrabi; Kale; Asian Greens; Mustard;
Shiso; Swiss Chard; Lettuce; Spinach; Arugula; Mizuna; Peas; Fava Beans; Carrots;
Turnips; Parsnips; Radishes; Beets; and a variety of herbs. We’ve done a lot of math to figure out how
much of each crop to grow and how to stagger the planting dates so in theory we
will spread out our harvest – Bea’s getting really antsy for more warm weather
to get here so we can finish the hoophouse, start some seeds and actually
implement any of these plans!
Our new garden site with all its various obstacles
Meanwhile, once it warms up again, we’re also going to be
installing a large kitchen garden over on the other side of our house – our
plan is to enclose a little more than 1800 square feet in deer fencing and then
fill that area with our summer crops.
This area is not the absolutely ideal spot for a garden, although it’s
the spot that will get the most consistent hours of sunlight and is closest to
the kitchen where it will be convenient to turn our harvests into sustenance. So what’s not ideal? The area is constrained on each side by
various obstacles: on the north side we have a large potentially dead tree, on
another side a shed, a laundry line running through the 3rd side,
and a power pole on the far side. For
this first year, we’ll be using temporary fencing so that we have the option to
move it and expand the garden in future years if desired. For instance, in winter, it’s impossible for
us to tell how much of the tree is actually dead and we don’t really want to
take it out if it’s still partially alive.
We’re also not really sure about the legality of enclosing a power pole
inside of deer fencing even if our property line goes past that. For now we’ve decided to make a bit of garden
art out of the laundry pole and use the natural run of the laundry lines as diagonal
pathways to break up the growing beds. And
the shed will be enclosed in the fencing too and house the garden tools, so
that works decently.
Anyway, this space will allow us to grow: Artichokes; Broccoli;
Brussels Sprouts; Cauliflower; Cabbage; Corn; Pickling & Slicing Cukes; Cantaloupe;
Honeydew; Watermelon; Beans; Dry beans; Soybeans; Lima beans; Tomatillos; Sweet
& Hot Peppers; Eggplants; Tomatoes; Potatoes; Okra; Summer Squash; Winter
Squash; Pumpkins; Peanuts; and Sweet Potatoes, plus an herb spiral of sorts installed
around the laundry pole.
Basic crop layout for our 1st season's kitchen garden
We’d love to install more fruit, herbs, and perennial
flowers as an entry garden into the hoophouse, but we’re trying not to plan
more than our budget or our muscles can sustain for 2014 – and we think we’ll already
be pretty busy in turning all these colorful pixels into fertile soil and thriving
plants in the two spaces we have cut out to tackle this year!
When I (Bea) worked on a farm back in 2005, the farmer I worked for didn't sell at producer-only markets and so we would buy up a bunch of products from other farmers and then sell them for a markup in DC. We used to drive many a mile to purchase wholesale Amish “Yogurt Cheese" in large tubes, like it had been formed in a Sonoform -- and then we farm workers would spend evenings chopping it into ~1/2 lb half-moon-shaped blocks and bagging it for resale at various farmers' markets. So that was my introduction to the concept of “Yogurt Cheese," which initially just sounded entirely disgusting & bizarre to me. However, as low-paid farm workers who had “room & board provided" [meaning, anything left over that hadn't sold by the end of our markets, we could eat ourselves], my coworkers & I became accustomed to this stuff.
After that farm season, I promptly completely forgot about it until recently when I was looking up basic cheese-making, and this recipe popped up for Yogurt Cheese that said it only takes 5 minutes. Well, hell. I can take 5 minutes to make cheese! I told Chris it was time for a science experiment and he happily rushed to the kitchen to see what I had up my sleeve. Science is a big motivator in our household!
You'll need:
Plain yogurt
Salt (optional)
Cheesecloth
Strainer
Bowl that the strainer fits into
Towel or plastic wrap
A day's worth of patience (or a bad memory!)
To Make the “Cheese":
Step 1:
Fold your cheesecloth in half or quarters and place it in the strainer, which should be set into the bowl.
Step 2:
Scoop out some plain yogurt into the strainer; the final volume will be less than what you start with, so we used half of our quart of yogurt as a trial run to make about a cup's worth of yogurt cheese. We were still a bit skeptical!
Step 3:
Cover the whole thing with the plastic wrap or towel, and refrigerate for 24 hours.
Step 4:
The next day, lift the strainer out of the bowl. The whey will have drained out of the yogurt and be caught in the bowl underneath, while your yogurt cheese remains in the strainer! It's sort of like the consistency of cream cheese or sour cream.
Step 5:
Pour out the whey and save it to use in baking projects, or discard if you don't want to use it in the near future--it won't keep too long.
Step 6:
Salt the yogurt cheese, if desired. Scoop it into an airtight container & store in the fridge.
Step 7:
Healthier “sour cream"
YUM!
Chris has enjoyed the yogurt cheese on a croissant with strawberry jam. Bea enjoyed it topping a “burrito bowl" (her term for a bowl full of burrito filling, but without the tortilla).
Chris's Aside:
This “cheese" is not actually CHEESE!!! Bea fooled me. I told her you can't really make cheese in 5 minutes. This stuff was pretty good though, you just have to make sure “cheese" is in “quotation marks" so people know it's not really cheese.