Friday, September 26, 2014

Farmiversary -- it's been a year already!?!

One year ago yesterday, we officially became farmhouse-owners and began a new adventure together.  What a year it’s been!  Looking back on the past year, we have two totally opposite reactions, summed up as follows:

Bea:  Living in the middle of nowhere is even better than I ever dreamed it would be!
Chris: I have so much constant stress and anxiety, all the time forever!

(To be fair, Chris had the same reaction to life in the big city.  And the suburbs.  He’s kind of an anxious person, sensitive to stress.)

Here’s a typical day as narrated by Chris:
  1. Are our pipes going to freeze again tonight?
  2. Will our vegetables die?
  3. How can we beat back the Japanese beetles & squash bugs?
  4. Is our well water poisoning us slowly?
  5. What if our septic system clogs up?
  6. What kind of chainsaw should we buy?
  7. Will I ever get any sleep again or will we forever be pickling vegetables?
  8. Why are these pears so weird?
  9. What’s up with our internet – today?


Bea’s typical day (also narrated by Chris) goes more like this:
  1. YES!  Another day where everything rocks!
  2. Today I will do so many projects all at the same time, and never go to bed!
  3. How about digging while I boil the water, coring pears while I process the pickles, chopping onions while the pears simmer, and planting our fall garden while the sauce reduces?  Maybe after Chris gets home from work we can build a fence before dark, eat a quick dinner, and then rearrange our furniture, and sort through two rooms worth of unpacked boxes!  Maybe that sounds like too slow of a day…maybe I’ll have time to do some laundry too!
(SIDE NOTE:  It NEVER all gets done!!!)


So, after a year, Chris has also come to appreciate some of the finer points of living in the country.  In the past year, we have made some fairly significant strides at establishing ourselves in our new home.
  • We moved all our stuff in 3 (yes unfortunately THREE) moving trucks, have basically unpacked & decorated our new house, and generally settled in.
  • We bought – drove to Denver – drove back – and sold – a used cargo van, our faithful AdVANture Van.
  • Chris found a job, twice!  Bea had her “last day” at her old job, thrice!
  • We won the National Reuse Contest by accident and ended up with a huge gift certificate for secondhand building materials, which we had to drive back to DC several times to spend up.
  • The aforementioned gift certificate helped us buy supplies to rebuild our 50’x20’ hoophouse, and complete it with gutters and a 500-gallon rain-barrel collection system (soon to be 1,000 gallons).
  • We installed a 45’x50’ garden surrounded by deer fencing, and grew over 700 pounds of food from it (and the hoophouse)!
  • We battled a plethora of insect and mammalian enemies and learned to identify several types of bug poo.  We also trapped (and released) a baby groundhog.
  • Bea joined the Central Virginia Master Gardeners and organized some gardening workshops, then volunteered weekly at the local food bank to help with their vegetable teaching garden.
  • We found a wonderful church that we both like and have gotten pretty close to becoming members.
  • Bea took some classes, read a lot of library books, and developed new hobbies exploring the wonders of things you can do with plants besides eat them (like natural dyeing, herbal medicine, flower pressing).
  • We digitized (60) 8mm silent films Bea's grandpa recorded of his kids (Bea's dad & uncle) between 1948 - 1969, and then scanned in slightly over (10,000) 35mm slides from his enormous collection.  We're about 2/3 done with digitizing the Trickett archive, before moving along to the Maxwell digitization project!
  • We canned over 200 jars of veggies and fruit, a sum total of over 19 gallons of food!  Also Bea filled our freezers.  Two freezers that is.  Bring it, apocalypse zombies!
Overall, both of us agree this new place suits us pretty darn well, and we're looking forward to seeing what the next year brings!


Tuesday, July 8, 2014

Pimp my Hoophouse: Rain Catchment System (Part 1: Gutters)

Barrels in our old shed
Windproof spot between our new sheds!
Over the winter, Bea spent
quite a bit of time wondering and researching why nobody ever seems to install gutters alongside their hoophouses. We're on well water and want to conserve as much water as possible so we don't run the well dry by watering our gardens! The hoophouse is a 1,000 square foot structure, which could collect 600 gallons with 1" of rainfall. Plus, we had already gone through the hassle of moving 20 non-nestable barrels several hundred miles when we moved here last fall, so we needed to put them to work for us!

Most hoophouse designs already feature a hipboard that runs the length of the hoophouse for stability -- Bea figured if you slanted this slightly then you would have a nearly perfect surface to mount gutters.  Why don't more people do this?!  After extensive research, Bea found mentions of gutters on hoophouses only three times.

  • The most helpful article was this tutorial from the Leopold Center of Iowa State University: Rainwater Catchment from a High Tunnel for Irrigation Use.  They have a really professional setup costing $1,900 (including a pump) which unfortunately was way beyond our non-budget for this project; still, it was a great starting point.
  • Sara over at the “put your shovel where your mouth is" blog authored a post about installing gutters on her hoophouse.  This was awesome to see that it could be done on a home-gardening scale without major expense!  She told us it's way more popular in England to install gutters on “polytunnels" (as they call hoophouses across the pond).
  • Bea found this article on Seedstock, featuring some innovative permaculture techniques happening at Sunnyside Farm, including the first photo we'd seen of multiple barrels (like we intended to install on ours).  Dru who writes at “Sunnyside Dru" featured posts about their rain barrels a few times between 2010-2012 (1, 2, 3) before they went “gutterless" in 2013.  It sounds like removing/installing the gutters every time the season changed was a huge hassle!
So it didn't seem like anyone had a perfect DIY system they were truly happy with, and we didn't have a couple extra grand to spend on super professional cisterns and gutters.  We'll write up how we connected the barrels and drip irrigation system in separate future posts, but for now we're just talking about how to hang the gutters themselves.  (For how to build the hoophouse structure itself, see our previous posts here: “Hoophouse Step 1", and Windows, Doors, & Sides.)

How to Install Gutters on Your Hoophouse

Step 1: Acquire Supplies

Lumber: 2x4s
+Cameron Forklift (our favorite DC-area reuse store) sells really affordable used lumber that's older and denser (i.e., longer lasting) than modern pine.  They don't often have treated lumber, so we just buy untreated and paint anything that will be exposed to increase its longevity.  You'll need as much lumber as the length of your hoophouse, times two if you want to install gutters on both sides (and why not?!).  You'll also need some short scraps of 2x4s (about 1' each) for joining the longer sections.
Lumber: 1x2s
You'll also need the same length of 1x2s.  Check around, sometimes it's cheaper to use a table saw to rip 1x4s in half than to buy 1x2s.
Brackets
We had no idea what this type of bracket was called, but Bea found it at Lowe's in the section with joist hangers.  Here they are on their website.  You'll need twice as many brackets as you have hoops.  
1" self-tapping metal screws
These are the same screws used to assemble the hoophouse.  If you're buying new, just be sure what you get is rated to cut through steel, not just sheet metal.
Galvanized Screws
Just regular 1-1/4" and 2-1/2" screws, galvanized for outdoor use.
Rain gutters, “seamers", endcaps, downspout adapters, & downspouts
We found what we thought would be most of the gutters we needed at Community Forklift; they were pretty heavily used (meaning bent and torn up in places).  Unfortunately, due to having to trim so much scrap from the used gutters, we had to purchase half the gutters new.  We used regular metal K-style gutters, which are about $7 per 10-foot section (new).  You'll want as many feet of gutters as you have length in your hoophouse, times two assuming you want gutters on both sides, plus 1' per side for overhang.  Add another couple extra feet to your shopping list “just in case."  Seamers are used to join two sections of gutter together, so buy however many packs you'll need given the length of your hoophouse (they come two to a pack).  For endcaps you'll need two left and two right endcaps.  Buy 2 downspout adapters.  For downspouts, you'll probably just need one 10-foot section which you'll cut in half.
Gutter Screws & Rivets
Buy enough boxes to attach a gutter screw every 2-3'.  Use aluminum rivets with aluminum gutters.

Step 2: Mark attachment points for your brackets


To do this, you'll attach a string with a line level to each end hoop, approximately 5' above the ground, running along the outside of the hoops.  Your side will only roll up to this height, so you can make it higher if you want.  Once your string is level where you want it, make a mark at its height on each end hoop.  (Note: if you perfectly leveled your hoophouse when you built the hoops, you can just measure up from the ground.  Ours sits on a slight slope, hence the line level.)  Then before you remove the string, get a tape measure.  You'll need to do a little math -- gutters should slope at least 1/2" for every 10' of run.  So if your hoophouse is 50' long, you'll need to measure at least 2.5" up from the string on whichever end you want to be “uphill".

We turned our natural downhill side into the uphill side of the gutter system -- meaning that water will run off the roof, into the gutters down to a single downspout, then collect in rain barrels, and from there use gravity to flow back downhill through the drip irrigation system.  In fact, taking advantage of this gravitational flow was the main reason why we didn't put a huge amount of effort into leveling the slight hill to install the hoophouse.  But it means that when you look at the side of our hoophouse it looks like the gutters have a really steep pitch, even though it really falls only a handful of inches.

Anyway, once you have your pitch figured out, move the string on your uphill side up to the 2nd mark you made, and X out the first mark.  Double-check that your downhill side of the string is still in its original spot, then go along each hoop and make a mark where the string crosses (it should make a nice long, even diagonal for you).


Left: original bracket      Right: bent bracket

Step 3: Bend your Brackets to 45°


Since the point where you'll be installing the brackets on the curved hoops isn't 90° vertical, you'll need to bend the brackets to about 45°.  It's OK if your hoops aren't exactly 45°, you'll be able to adjust them with further bending once you get them attached.  Wear gloves since the metal edges can be sharp!

Step 4: Attach Brackets


Use the self-tapping metal screws to attach one bracket to each hoop using the the marks you made as guides.


Step 5: Attach 2x4 Hipboard to Brackets


Starting with the end hoop (doesn't matter which end), use the short galvanized screws to attach a 2x4 to the brackets.  The board should be long enough to have attachment points on at least two brackets.


Step 6: Use wood scraps to join 2x4s


Use 2-1/2" screws to fasten a wood scrap to the end of the 2x4 that you hung up (use 3 screws in a triangle pattern) -- you'll want the scrap on the inside and overlap it about halfway (6" or so).  Then hang the next 2x4 butted up against the first.  It's easier to butt it up, then screw into the brackets, and come back and screw it into the scrap joiner once it's not levitating.  Repeat this process until you get to the end of the hoophouse, then repeat again on the other side!  (Even though this picture is of Chris painting, just check out the joint where he's working.  That's the scrap-wood-butt-joint we're talking about!)


Step 7: Hang 1x2s


The 1x2s are going to be attached flush with the top of the 2x4.  Their purpose is to create a lip so that the plastic sticks out past the gutter, and water will flow down into the gutter (as opposed to sliding down the plastic behind the gutter).  Just use the shorter screws to attach the 1x2 into the 2x4.  You don't want any joints to match up with the seams of the 2x4s, so you might cut a 1x2 in half and mount that, then use full pieces in order to stagger the seams.  Or if you're using secondhand lumber, they're probably random lengths so chances are nothing will match up anyway!

At this point, you can really see where we messed up bending some of the hoops -- from certain angles the boards are totally out of line!


But from other angles, it looks just about perfect!  We'll just photograph the hoophouse from there ;-)


Step 8: Paint if applicable


If you've used non-treated wood, you'll want to paint these because they'll be in contact with the plastic which accumulates condensation.  Watch the video to see Chris demonstrate a neat trick for dripless painting:


With everything painted bright yellow, darkness descended and Bea packed up the tools for the night.


It wasn't until several months later (after completing the rest of the hoophouse build project), we finally got back to Project Gutters!  You'll need your plastic covering attached before proceeding.


During the spring, after Chris accidentally ran over our garden hose with the lawn tractor, Bea set our gutters out in a long line as a hose-protector.  This worked great, but when we finally got around to installing them on the hoophouse they had collected all sorts of grass clippings and insect ecosystems!  Unless your gutters are brand new, you'll want to them scrub out because whatever's in them will end up falling into your rain barrels and you want to filter out any solid particulates.

Step 9: Connect endcap to downspout adapter 


We started on the downhill end of our gutters.  First, Chris notched the adapter so it would overlap and sit properly into the section of gutter.  Remember to “Think like a raindrop" whenever you're overlapping gutter sections (or roofing, or anything dealing with moisture protection!) -- overlap the uphill section over the downhill section so water runs across the seam (rather than through it).  Step two on this website shows a nice graphic of how to notch the gutter so they'll overlap properly.  Then, rivet an endcap in place with aluminum rivets.


Step 10: Hang first gutter section on hoophouse


Hang the gutter on the bottom half of the 2x4 hipboard (butt it up immediately under the 1x2).  You'll use 7" gutter screws driven into the 2x4; install them about every 2'.  You want the downspout to hang out past the endwall of the hoophouse by at least 6", so the very end of the gutter won't be supported but for such a short distance this doesn't pose a problem. You'll want the sides rolled up so you can reach the gutter (or have a place to put your ladder).  This would've been much easier to do before planting our beds!

Here's a closeup of how it fits right under the 1x2 -- so you can see the 1x2 just juts the plastic out over the gutter trough to facilitate water flow:


Step 11: Hang the rest of the gutters using “seamer" connections


Attach the seamer to the end of the next gutter section while it's still on the ground, it will make your life a lot easier!  Pre-bend the back seam at 90° so it doesn't stick up into the 1x2.  Then lift it up into place to butt up with the previously-hung gutter section.  Once it's hung, come back and bend the loose end of the seamer down flat with both gutters it's connecting.  For now just use these metal connectors; you can come back and caulk the connections at the end after you've hung everything up.


Step 12: Connect endcap on final gutter section

West side

Use a hacksaw or tin snips to cut the final section of gutter to length.  Then use the aluminum rivets again to connect the other endcap to the uphill end.  Hang it up and you're done guttering!  The rollup sides roll up to the lowest part of the gutter.


East side

Step 13: Repeat on the other side of the hoophouse


Step 14: Connect downspout


Even if you're going to tie into a rain barrel manifold that isn't quite ready yet, you'll need some type of downspout to divert the water away from the base of the hoophouse.  Here's our temporary one-barrel system.  Stay tuned for the 20-barrel system, coming soon!


Step 15: Test the system with a hose (Optional)

Project hoophouse gutters: success!

Monday, June 23, 2014

Yum, yum! Our Recipe Roundup for Spring Vegetables

Apparently this past weekend, spring ended and now it's summer so we'd better post this before too much more time elapses!

Since we've been doing a lot of harvesting this spring, we've also been doing quite a lot of eating!  We've also clearly fallen behind on ever being able to keep up with writing about it all, although there's already PLENTY of cooking blogs out there so we can only feel but so bad about it.  Still, for reference's sake, we've decided to round up some of our favorite spring recipes & photos here, made using some of the produce we've grown.

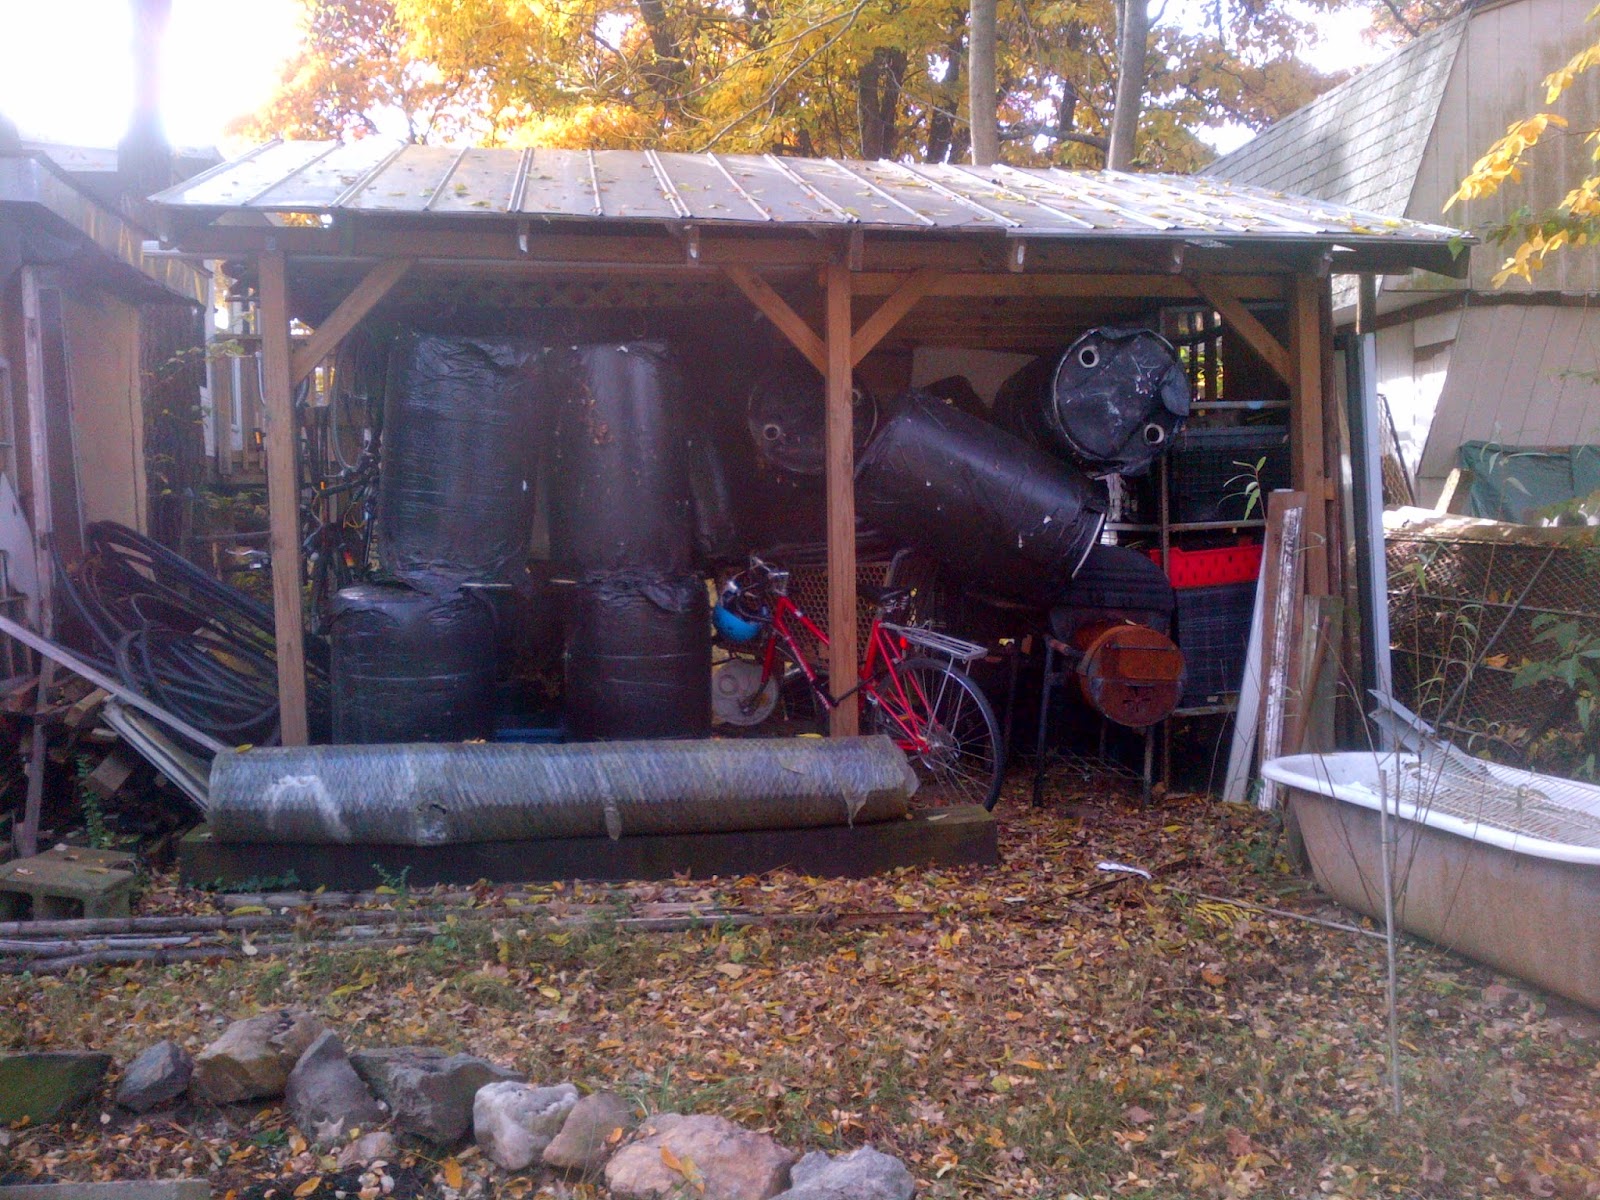
Our old shower stall holding LOTS of tomatoes in 2009!
We'll warn you, Bea's cooking habit tends to be to schedule one day per week when she'll spend 10+ hours cooking everything in the fridge, but until that time the fridge (and the spare fridge) are overflowing with random bags of produce.  Recently, Bea stumbled on this old article where she is quoted thusly: “‘We've got about five gallons of gazpacho,' says program director Bea Trickett."  Bea remembers this NFI 2009 fundraiser event fondly -- installing a window air conditioner set on the coldest setting in a small tiled bathroom to serve as a “walk-in-cooler."  The things you do in DC in August when you only have one refrigerator!  It all worked out great, and soon enough we had turned these tomatoes into 5 gallons of gazpacho.  She just hadn't had any true marketing experience yet to know that announcing the sheer quantity of food available wouldn't be the hook needed to lure most people to the event!  Live & learn.

Bea's bathroom door August 2009
Gazpacho + two tomato sauces + a canner = one fun evening
So nowadays, even when not cooking for a crowd, it always makes Bea happiest to cook as much as possible in one go, dirty every dish/pot/pan/bowl in the kitchen, use every stove burner & shelf in the oven, and then have a feast!  So because of this, she hasn't put a ton of effort into trying to stagger our harvests, preferring instead to do one massive harvest and one massive food preparation/preservation effort per crop.  It's also Chris's favorite thing to hear “We're having leftovers!" because then he knows what to expect, there's no dishwashing those days, and we get to eat dinner before 10pm!  This isn't necessarily the most practical way to cook/eat, but there it is!

With that disclaimer out of the way, now on to some of our favorite recipes!

Radishes


Radish Toast: Seriously simple, this is surprisingly delightful every time!  Working in the hot sun you start to lose salt, and while you probably can't see the large sea salt crystals in the photos, there's quite a LOT of it sprinkled on top.
 

Roasted Corn and Radish Salad with Avocado-Herb Dressing: We have very seldom followed any recipe for making a salad, but this was one of the best salads EVER!  We had to buy the corn and avocado but everything else came from the hoophouse garden.  We added chive flowers as a pretty & tasty garnish.

Radish Tart: This is one recipe that we don't follow precisely -- we add onions, garlic, and of course a lot more radishes mixed throughout the filling to make a more flavorful & hearty quiche/tart.  We also use whatever cheese we have, usually a shredded Mexican blend, and it tastes great.


Radishtop Soup: This is a tasty recipe that uses radishtops -- why throw away (or even compost) all those healthy greens?  We made quite a lot of this for our freezer (just wait to add the cream until after defrosting).  We used way more radishtops than called for in the recipe -- basically just added them until the pot was full (then they cook down).  Bea also added a good amount of smoked paprika for seasoning, and then a little more for garnish!


Radish Coleslaw: Chris got teased incessantly at work for the strong smell of this coleslaw, but put up with his coworkers' complaints because he loved finding it in his lunchbox as a healthy treat -- so tasty!  We didn't have a green cabbage so just went with purple cabbage, carrots, and radishes -- the radishes we had at the time were white icicles so they didn't add any color, but we'll definitely be making this colorful snack again!


Kale

There were a lot of spring nights that looked something like this, with Chris “massaging" avocado into a kale salad and Bea mixing up dressing into a batch of kale chips.  Our kale did really well!


Esalen Kale Salad: If potluck dinners gave out awards, we would have won several with this recipe!  This is a raw, vegan, gluten-free, and utterly delicious salad that everyone can eat.  We make a big batch of this salad about every other week, and using our own kale was way faster to prepare than store-bought because our stems were so tender we just left them in.  We usually leave out the sprouts solely because we never have them, but it's just as tasty without.

Kale Chips: We've already shared the recipe we use a few months back, we have just gotten way more adept at making them this spring!  Using dinosaur (lacinato) kale works well because it gives the chips a nice texture.


Beets

Beets are one vegetable that Chris flat-out refused to eat until he was 20 and then it became one of his favorites.  Bea had never really been exposed to beets as a child, and so never went out of her way to eat (or grow) them until Chris was clamoring for a garden full of beets!  This spring we planted 4 types, 3 of which did well, so we got to try out a few beet recipes.


Beets and Caramelized Onions with Feta: This wins both of our all-time favorite beet recipe, and it's rare we'll agree on anything so heartily!  Unfortunately this recipe is printed on a piece of paper in Bea's recipe notebook and there's no source attributed to it.  Googling hasn't brought up the exact version we have.  This recipe is almost the same, except obviously the version we have uses fresh beets boiled for 40 minutes or until tender and adds the cheese just before serving.  We'll have to write it up sometime!


Beet Greens: Again, why discard the healthy tops?  Bea seldom uses a recipe for cooking greens, just throws onions in a pan with a little olive oil, cooks for a little while, adds some garlic, Bragg's liquid aminos and cider vinegar, and throws the greens in on top to wilt (don't stir them in), then cover with a lid for a couple minutes.  If there's a lot of greens she may stir them in to cook down and add more on top.


Roasted Beet Salad with Walnuts and Goat Cheese: This recipe is from one of Bea's favorite cookbooks, Vegetables Every Day by Jack Bishop.  The book is alphabetized by vegetable so it's easy to find recipes matching the item you have in hand.  The goal of each recipe is to bring out the flavor of the featured vegetable, so this book works well with the “cook one crop at a time" mentality, not so much with the “my fridge is bursting with multiple vegetables and I need to cook them all at once" method.  Still, every recipe we've tried from this book has turned out delicious.  Each vegetable has a two-page summary highlighting best practices for selecting & preparing it, which will come in handy when we decide to grow something unfamiliar for some unknown reason (e.g., this year, Cardoon?) but have never prepared it before!

Beet Popsicles: Once you've boiled beets, you end up with leftover beet water that's got a lot of flavor & nutrients.  We spent a bit of time debating whether to just throw this away, but ended up making an experiment of beet popsicles!  Combine beet water equally with apple juice and pour into “popsicle molds", in our case dixie cups with plastic spoons set up on a cookie sheet.  Freeze.

Then you have a healthy cool treat for those hot days!  Warning: may turn mouth/tongue purple.

Asian Greens

Having been vegetarian for so long, Bea kind of loves Asian greens.  They've got fat juicy stems and flavorful leaves that barely need any heat before they're fully cooked.  They're a perfect match for a tofu or tempeh stir-fry, and a great excuse to use some luscious toasted sesame oil -- yum yum!

Asian Greens with Icicle Radishes & Tempeh: All right, we didn't use a recipe for this.  It was something like: (1) brown the tempeh in a little olive oil, then remove to a plate.  (2) cook up some onions in the olive oil.  (3) add radishes, garlic, and soy sauce -- cook until tender.  (4) add greens and drizzle with sesame oil, cover with a lid, and check after a minute or two -- you only want to wilt the greens very slightly.  (5) stir back in the tempeh and mix well, serve immediately.


Another Asian Stir-Fry: This was the meal we cooked for our first dinner party we've hosted at the farmhouse -- it came out pretty well!  Similar to the recipe above, except this involved marinating tofu in a mixture of soy sauce, sherry, pulverized ginger, and garlic for a couple hours and then frying it in olive oil/Braggs.  We buy tofu at Costco and freeze it, which changes the texture into something similar to a sponge -- but for marinating this works really well because it absorbs endless amounts of flavor.  You'd need to add breading if you want it crispy (usually we use a 50/50 mixture of nutritional yeast & cornmeal) but in this case we were rushing to host folks and decided soft tofu would be good enough!  We grabbed Hakurei turnips, carrots, and peas, because that's what was ready to harvest.  For greens here we probably used Mizuna.  The basic concept is to cook all the roots first until they're tender, then add greens on top to wilt.  Tofu has already been cooked separately, and then just stir it all together in a big bowl.  Serve with brown rice if desired.


Radish Curry with Mizuna: The original recipe calls for radish tops but we'd already used those up in soup, so we substituted Mizuna.  I'm pretty sure we used powdered curry/chili instead of the fresh ones called for, but used a lot of the powder for good flavor.


Swiss Chard

We've usually cooked chard like beet greens described above (the plants are cousins, after all!).  But since our chard patch is doing really well, and we hope it continues throughout the summer, we decided to try out some new recipes.  We found this one that is absolutely delicious (it involves bacon).


Savoury Swiss Chard Tart: The first time we made this, we used the crust recipe from the radish tart (mentioned above) and used cheddar instead of Gruyere (so expensive!).  The next time Bea decided to to make 3 pies at once to freeze, so she just bought the crusts!  So tasty!


Herbs

Sage fried in butter is one of the tastiest things ever!  We used to use this as a pizza topping (back when Bea ate pizza), but now we tried it as an omelette filling and it worked great!  Crispy sage, some goat cheese, and walnuts made the filling, and eggwhites made the omelette.  Complete healthy & low-carb breakfast in just a few minutes!

We have to write a separate post about salmon-sorrel lasagna.  We discovered the recipe a couple of years ago and now it's been removed from the website and no amount of googling has turned it up.  Luckily Chris cached the page!  It's very high-carb, but freezes well so you can spread eating it over a longer time period.

Strawberries


So you know how we weren't supposed to get a strawberry harvest this year because we were supposed to pinch the flowers off?  Yeah, we didn't do that.  So here's a couple strawberry things we have made:

Low-carb crepes with strawberry/spinach filling:
We just followed the recipe for the savory crepes, and flipped them with the help of a special crepe spatula a chef friend recommended.  For the filling, Bea wilted the spinach with balsamic vinegar, then tossed in sliced strawberries (should've done it the other way around so the spinach didn't overcook, but the strawberries were a last-minute inspiration!)  Top with crumbled gorgonzola and chopped walnuts.

The best vegan raw dessert ever: Chocolate Strawberry Truffle Pie!  Basically this pie is filled with cashews (both filling and crust) which is one of our favorite nuts.  It's a frozen pie so it's a perfect treat for those hot early days of summer.  And there's no processed sugar -- the sweetness all comes from the strawberries, agave, and raisins/dates!  The best part is besides chill time and soak time, it took literally only 10 minutes active prep time to make it!


Lemons

Haha, ok we didn't actually grow any lemons!  We did find a large bag of organic lemons on sale (Bea had been looking for a while).  Conventional lemons are one of the more heavily sprayed crops and usually you discard the peel but we wanted to make limoncello, meaning you use the very outside of the peels -- hence the quest for a large yet affordable quantity of organic lemons!

Limoncello: We used this recipe, but split the infused vodka in half and made half with sugar syrup and half with stevia syrup.  Even though this recipe only wanted us to wait 4 days, we waited 2 weeks for the infusion to finish, since we read on other recipes you have to wait at least a month.  Our peels hadn't lost all their color, but the flavor was really lemony.  Supposedly if you keep waiting, the bitterness disappears.  Bea's impatient though, and not a super-taster!  So 2 weeks seemed like a happy medium.


After making limoncello, you end up with about a dozen peeled lemons that need to be used up.  Bea searched google and ended up on yahoo answers where someone posted a less formatted version of a Martha Stewart recipe for Rich Lemon Ice Cream.  Luckily we have an ice cream maker (thanks, Goodwill!) and happened to have all the ingredients on hand, so we whipped up the most amazing frozen treat!  It's seriously rich; we think it's actually technically frozen custard although probably Martha Stewart knows the intricacies of naming recipes better than us.  Anyway, we highly recommend this!


To use up the rest of the peeled lemons, we wanted to make something with less sugar, so opted for low-carb lemon bars but subbing stevia for xylitol.  If you are used to the taste of stevia, these are pretty tasty, albeit very tart.  If you're expecting them to taste like regular high-sugar lemon bars, you'll be sorely disappointed.  But if you've reset your sugar threshold so that eating raisins seems like candy, these are a delicious treat indeed!


The best thing about eating seasonally is that as soon as you start to get sick of what you've been harvesting all spring, the summer squash, basil, and cucumbers are already coming in strong and giving you new flavors to experiment with!